|
To take a Lightscape solution and go through all the steps necessary to make a UV mapped baked solution in Lightwave from it.
- Lightwave v6 or above (preferably 8.2)
- Lightscape v3.0 or higher (preferably 3.2)
- Accutrans 3D (read step 3a to see why)
As I explained in Part III of this tutorial, you can import a Lightscape scene into Lightwave using the Lightscape import plugin. However, this has several drawbacks. First is the problem of the 'Too many vertices in Object' message you will get if an object contains more than 512 vertices. That will happen quite a lot, especially considering the tesselation Lightscape performs. There are easy ways around it, but they always end up giving you more material divisions, which is a pain since each material's shader needs to be set by hand to the correct object. (see part III). Then the biggest problem is that of not being able to save your objects. Also, the solution is not editable in any way. If you are familiar with Lightscape you will know that some black parts in your solution can be hard to avoid.
I developed a mthod which will circumvent all these problems. I have focused on it to be able to handle large complex scenes, and with an absolute minimum of manual adjustment of a list of properties. I hate repetitive tasks. So, although my method is far from ideal it will do the following:
- Get the complete lighting and mesh information from the lightscape scene.
- You will be able to save, edit and adjust the model as it is just a lightwave model
- No tedious work to be done
- A solid workflow that is predictable and accurate
- An editable radiosity solution
The downsides of this method:
- It is never free. You will have to pay for at least Accutrans 3D (20 US$)
- In the final model, You will lose all your material settings set in Lightscape
- If using the cheap route ($20) You will end up with the tesselated model of Lightscape, not the clean imposer object.
- Quite a bit of work is necessary in Lightscape to get your model to export well
You might say, why don't you use the Mest to Texture (M2T) function of Lightscape. I can suggest to go ahead and try it. You will meet disaster and a very long waiting time before you hit the disaster. Frankly, the M2T function is plain broken, and of no use. And you would have a problem with part II of this tutorial too since its quite difficult getting preper UV mapped geometry into Lightscape.
We start off in Lightscape. In order to accurately predict what is going to happen and what you will need to do in Lightscape to make it happen properly you will need to have performed the workflow described in this tutorial several times. You will sometimes need to do illogical things, such as mapping a random image to a surface, just because of the mapping. Because of these illogical things, I will adopt a trial-and-error way of doing this tutorial. We start out with the Lightscape scene we made in Part II of this tutorial, and try to end up with the thing in Lightwave v8 in the end.
|
Download the Lightscape scene from Part II here. (ZIP 2.6 Mb)
This scene contains free 3D objects downloaded from Ultra3D.com. Note that this tutorial and all files associated with it are property of Except, and may only be used in relation to self-teaching through this tutorial. Nothing of this tutorial and its files may be copied, published or distributed in any way without prior consent from the author.
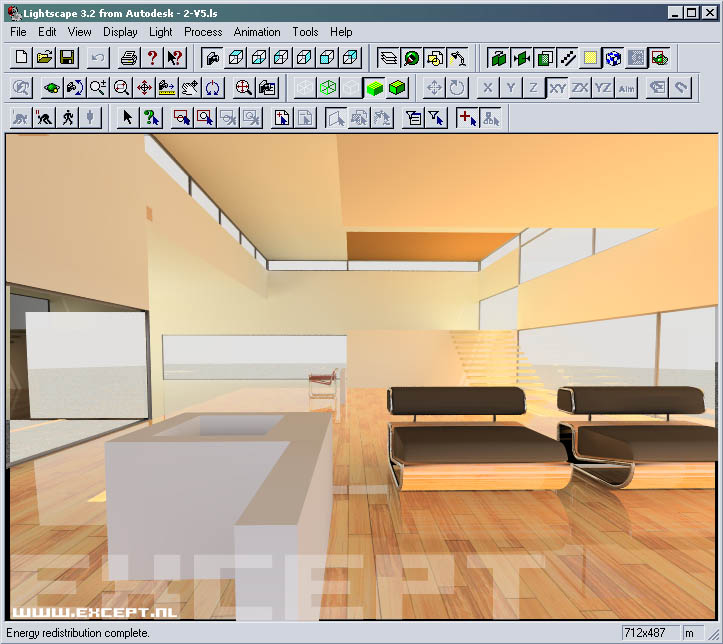
This is the scene that we will be working with. We made the scene from a Lightwave scene in Part II of the tutorial. It is a typical simple scene, with a few areas of high poly count, which are the pieces of furniture. They would prove particularly troublesome using the method described in Part III of this tutorial (the Lightscape Shader part), but you will see that they will prove no particular concern with this method.
Open it in Lightscape. Take note of the material names and perhaps walk around the scene a bit to know what it looks like. |
 |
If you have a scene where the direct light is present in the model, I would advise to turn it off, especially for sunlight. Once you turn it off, you need to let the solution run again for a few steps, so that Lightscape will subtract the direct light from the solution. The direct light will be calculated by Lightwave later on, which will yield much more defined shadows, and more control over them.
This scene has direct light turned on still. If you want to do it properly, turn it off. I forgot to do it, but it doesnt impact the current scene much.
|
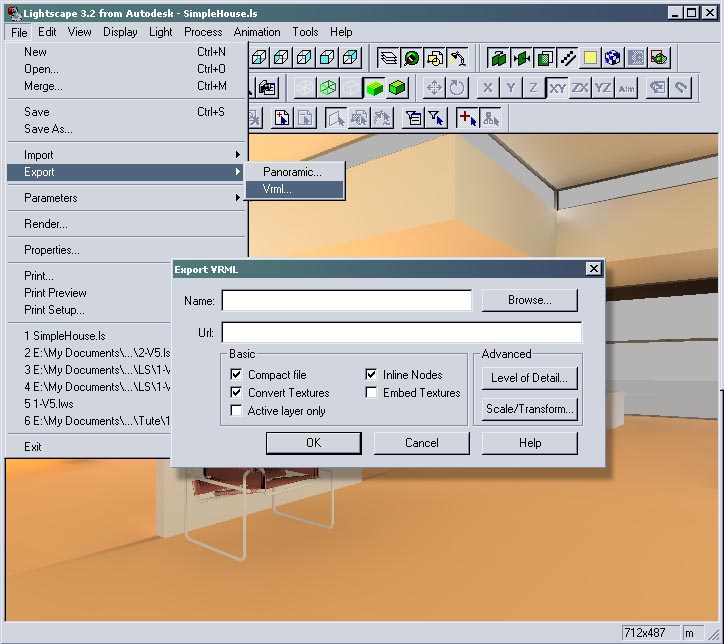
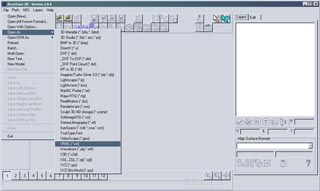
Export this solution to VRML by going to File > Export > VRML.
In the Dialog box turn off Compact file and Inline Nodes. Leave Convert Textures on and Embed textures off. Give your file a name. I named it "Simplehouse.wrl". This exporter will give you a VRML 1 file, not a VRML 2 file. This is an old standard, which is not often used anymore. |
 |
For this step you will need Accutrans 3D from Micromouse productions (version 2.9.9 or above). Accutrans 3D is a 3d object translation and conversion program written by Wayne Hogue. He has been so generous to adapt his program specifically for use in this method. No other conversion program that I am aware of will be able to do this step accurately and properly. If you have Polytrans, you can give it a shot, but with the versions I have tried I ended up with an inferior, damaged model.
Accutrans 3D typically costs 20 us$ and is available from the Micromouse Website. See the Licence Fee details on accurate pricing.
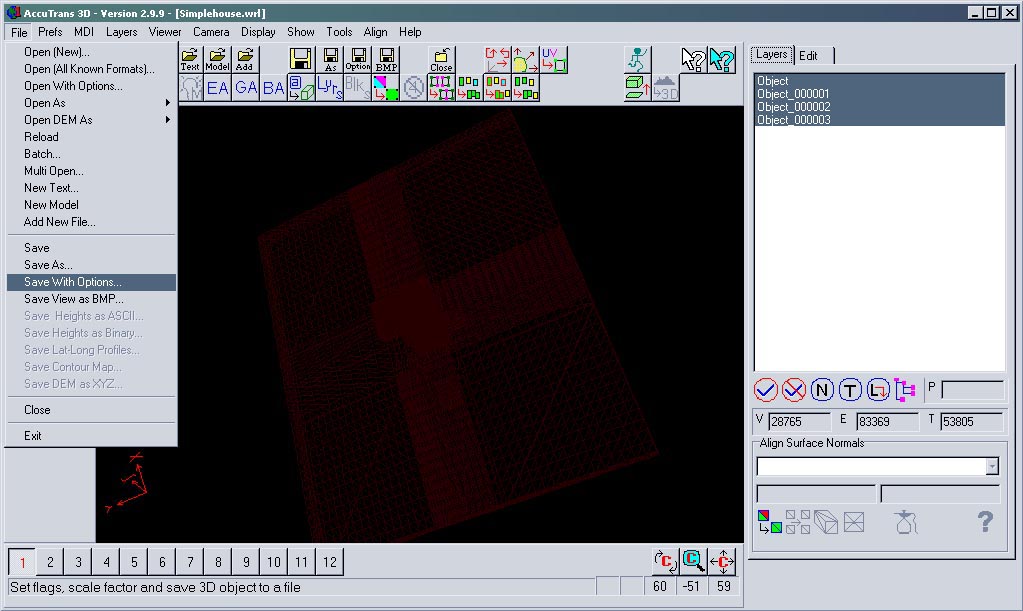
Open the Simplehouse.wrl in Accutrans using
File > Open As... > VRML (.wrl) |
 |
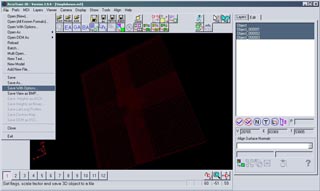
The screen will remain black. This is OK. Now save the object by going to:
File > Save with options... |
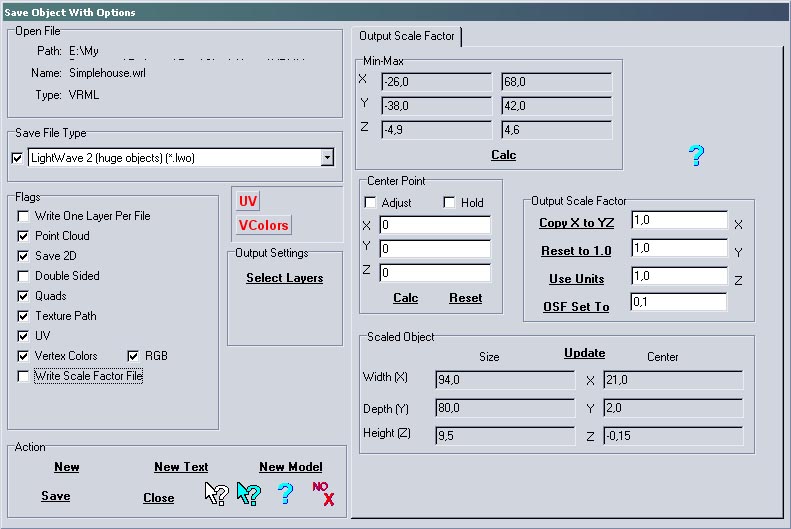
 |
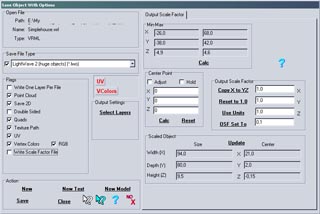
The following screen will set your output options. Make sure the 'Lightwave 2' File Type is selected. Make sure at least 'UV' and 'Vcolors' is ticked.
Save the object. I named it "Simplehouse.lwo". |
 |
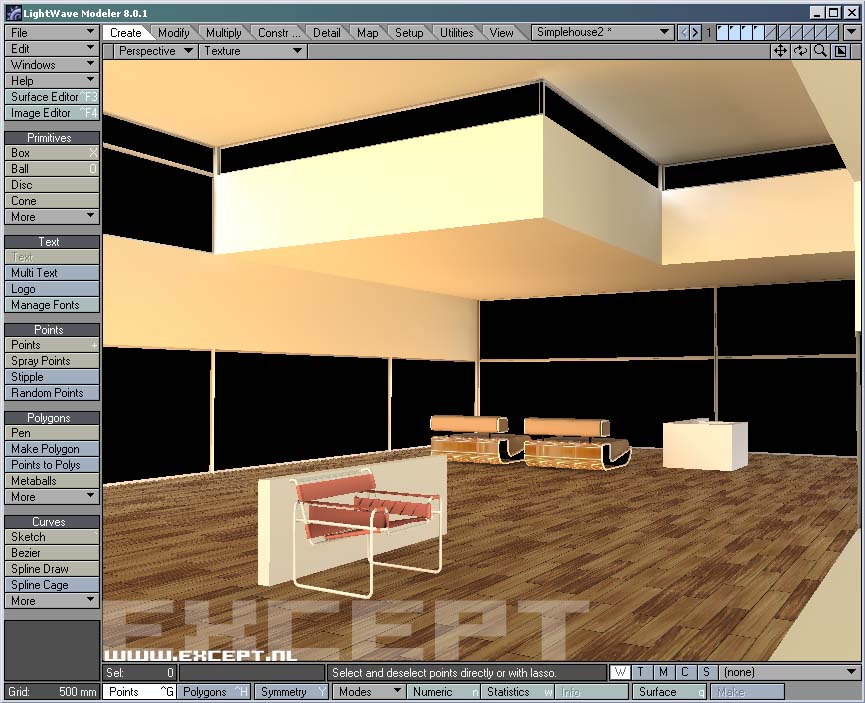
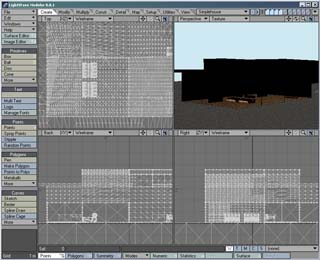
As you see, we have the object in modeler now, all tesselated and so forth. And no radiosity solution. Or so it seems. It should be noted here that we CAN see the floor, with the texture applied, but everything else is black. Thanks once more to Wayne Hogue, who figured out at this stage that VRML uses an additive method to apply vertex colors, and Lightwave uses a subtractive method. Therefore all we need to do is set all the colors of all the materials to white.
As you can see Accutrans 3D has nicely applied the appropriate vertex maps to the surfaces. The model is also split up in layers, according to material.
|
 |
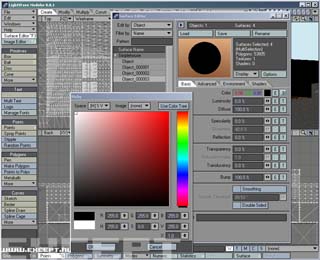
Open surface Editor, shift-select all surfaces at once, and change the diffuse color to 100% white. Also set the luminosity of all 4 sourfaces to 100%.
|
 |
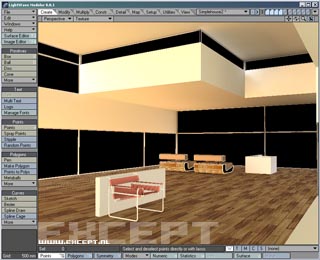
And here we see the result of months of hard work. Deceptively simple isn't it? The radiosity solution in Lightwave.
The experienced Lightwave user will know what to do from here on to make this model into UV mapped texture maps using Surface Baker, or if you're rich, Microwave.
There are still some nasty little critters just lurking under the surface though. For instance, you might have noticed we only have four surfaces! That can prove particularly troublesome.
In this case, the most problematic is the fact that our glass is gone. We have no more separate surface of glass. Normally selecting each glass polygon and making them glass again wouldn't be so big of a deal, but it is once you realise that this is the tesselated model. We have thousands of polygons to wade through. No Thanks! Thank god there is a solution.
|
 |
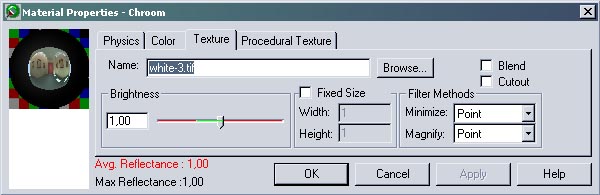
If you investigate the four materials that are present in the current model you will see that these four materials were the once who had a texture map applied. Textures are apparently the functional divider of the materials. Since that is the case, we will need to apply a texture map to the windows and any other material we want to manually adjust.
I have chosen to make the walls, ceiling, glass, stairs and metals separate. Because these are 6 different materials, I have made 6 small white images and gave each surface a unique white image. Don't change anything else in the surface panel of Lightscape. |
 |
Export the model to VRML again (Simplehouse_V2.wrl), open in Accutrans 3D, save as LWO2, open in modeler, set all surfaces to White and 100% luminosity, save object, open in Layout.
Getting the hang of it?
Notice that when materials have a texture assigned to them, their body color is removed by Lightscape upon exporting to VRML. This is not an error, since if the color of the material would remain in the vertex map, all textures would receive this as a color base, and look horrible. Thus, if you assign a texture map to a material, you will need to reset the material color.
Some people have experienced a blanding of color if a material has received a texture instead of just being left alone. Experiment a little and see if this is the case with your model. I have no such experience. |
|
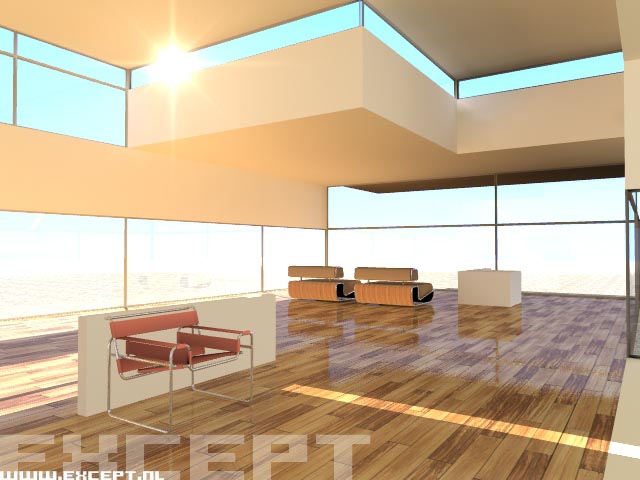
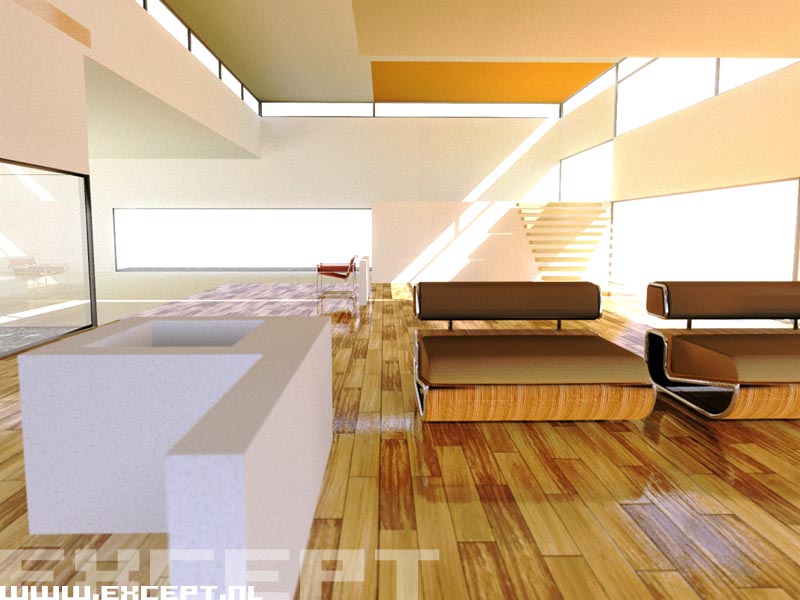
Now find out which material is what. Either look at the texture name, or set the luminosity to 0% and see what changes in the viewport. Rename the surfaces according to what they are for easy editing.
Then fire away. I just set some background gradient, a sunlight and surface properties, and we get this render. It took almost but not quite a minute : ). Pretty awsome.
The second image to the right has Virtual Darkroom, Corona and Exposer applied for the film look. This one renders in 29 seconds at 800x600, low AA.
Ok, you're set for now, next step is investigating baking using Surface Baker (part V) , or preferably, Microwave (part VI).
|

 |
If this tutorial proves especially handy for you, would like to support the creation of more of these tutorials and new developments, or would just like to express your thanks, you can make a donation by clicking on the following button, or alternatively just send me an email.
|
|